Back to TheWorxHub for Senior Living Main Menu
Adding Residents
In order for your residents to be able to submit and monitor work requests, you must create login credentials for them. To create a resident account, first determine where the resident will be staying.
Selecting the Resident's Location
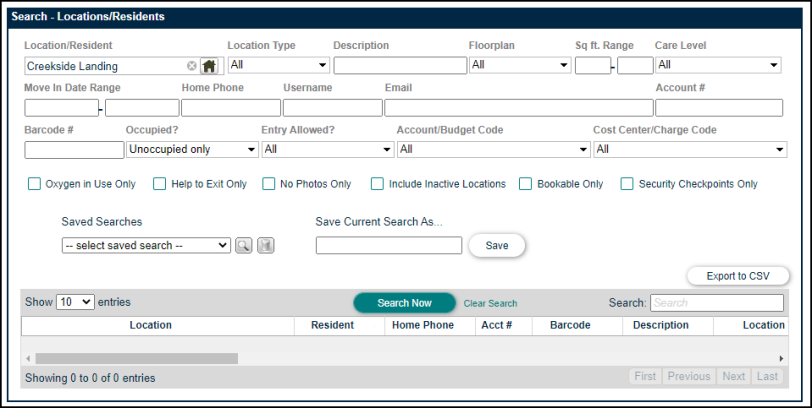
- Click on the Search tab, then select the Locations/Residents tab.
- Type and select the location where the resident will be living or click on the location picker (
 ) to choose the location.
 - To see all unoccupied rooms, select Unoccupied only from the Occupied drop down menu.
- Click the Search Now button.
- Click the Unoccupied link next to the location where the resident will be staying. This will bring up the Resident Information form.
Creating the Resident's Profile
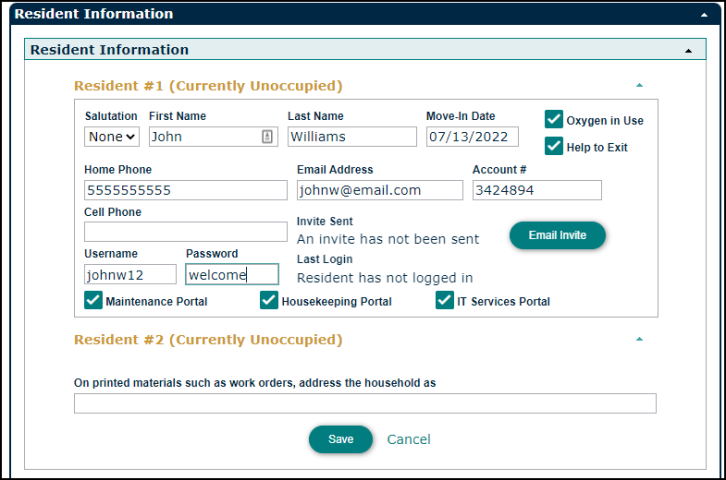
- Fill out the resident's basic information such as First Name, Last Name, and Move-In Date.
- Check the Oxygen in Use and Help to Exit boxes if applicable. This can help to find all resident locations with oxygen tanks for the fire marshal, as well as all residents needing help to exit in case of emergency.
- Enter the resident's Email Address. This is required for them to reset their password in case they forget it. *Note: This field is optional, and only necessary if you want this resident to be able to log into the system.
- Enter a Username for the resident. *Note: This field is optional, and only necessary if you want this resident to be able to log into the system.
- You can choose to either enter a Password for the resident or leave the Password field blank and click the Email Invite button. This will send an email to the resident providing a link to access an account management page where they can create their own password. *Note: This field is optional, and only necessary if you want this resident to be able to log into the system. We recommend using a secure password that includes letters, numbers, and a symbol.
- To manually change this password, you can later write over the existing password with a new one at any time from this screen. This is helpful if the resident does not have a functional email address to request a password reset email themselves.
- If you run multiple departments, you can specify which departments the resident can submit requests to by checking the appropriate boxes next to each department name. *Note: The available portal checkboxes will vary depending on what your account has purchased.
- If the resident will be living with another resident such as a spouse, click the arrow next to Resident #2 to expand an additional resident information form.
- If applicable, enter an alternate household name to display on printed materials.
- Click Save. Once you click save, additional panels will appear, as well as an option to upload a photo of the resident.
Additional Resident Details
Entry Instructions
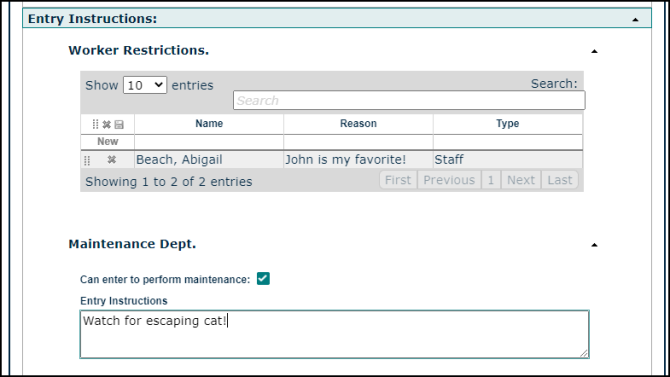
- Click Entry Instructions to expand this panel.
- If needed, Worker Restrictions can be added in this section. This will create a pop-up notification if the work order is assigned to a worker that has been restricted. The work can still be assigned to the worker if needed, but the pop-up notice must be acknowledged to assign the work order to the restricted worker.
- For each department, check the box to indicate if the worker can enter to perform work.
- Enter any Entry Instructions.
- Click Save.
Transportation
- Click Transportation to expand this panel. *Note: This panel will only show for accounts that have purchased the Transportation module. If you are interested in purchasing this module, please contact your sales representative.
- Enter any favorite destinations for the resident by clicking on Add Favorite and filling out the Add New Favorite Destination form.
- Click Save to add the destination as a favorite.
- Check the boxes if the resident requires an accessible vehicle and if a caregiver is required on trips.
- If a caregiver is required, enter the Caregiver Name.
- Add any Special Notes.
- Click Save.
![]()
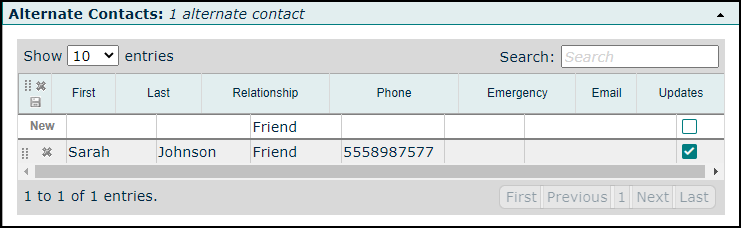
Alternate Contacts
- Click Alternate Contacts to expand this panel.
- Enter any alternate contacts to associate with the resident.
- Click the Save icon to add the contact to TheWorxHub.
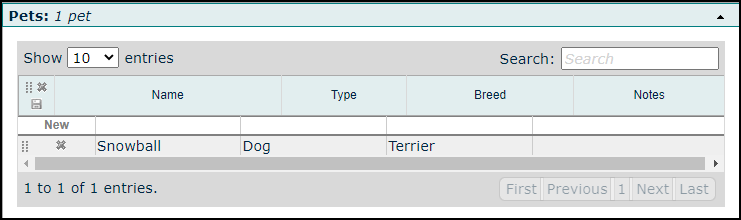
Pets
- Click Pets to expand this panel.
- Enter any pets associated with the resident.
- Click the Save icon to add the pet to TheWorxHub.
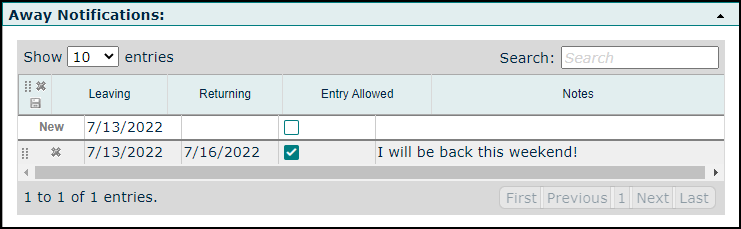
Away Notifications
- Click Away Notifications to expand this panel.
- Enter the away dates and check the box to indicate if entry is allowed. If the Entry Allowed box is not checked, TheWorxHub will put up a message whenever work is being scheduled for that household while the resident is away.
- Click the Save icon to record the away message.
Move History
- Click Move History to expand this panel.
- This panel shows where the resident has lived since being entered into TheWorxHub.
- For more information about moving a resident to another location check out the Resident Moves page.
Attachments
In this section, you can add any attachments from your computer, the web, or from a Dropbox account.
- Click on Attachments to expand this panel.
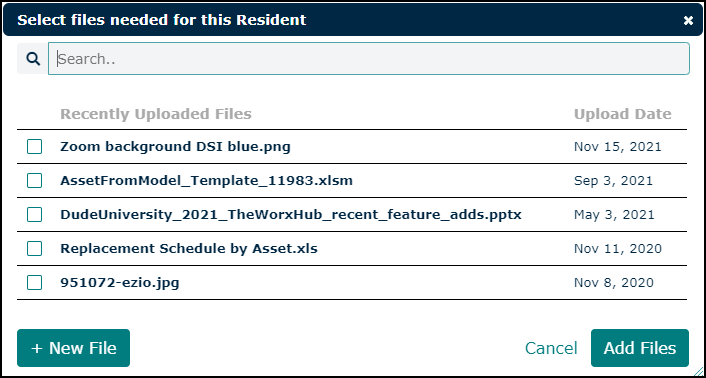
- Click the Add Files link.
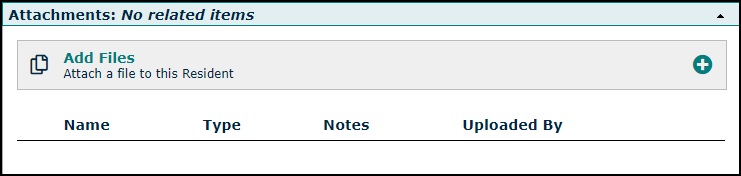
- The File Selection window will display a list of files recently uploaded to the File Library.
-
Use the Search field to search for additional files.
-
Check the box for any file you would like to attach to the resident, then click the Add Files button.
-
If the file does not currently exist in the library, click the +New File button to attach the file to the resident.
-
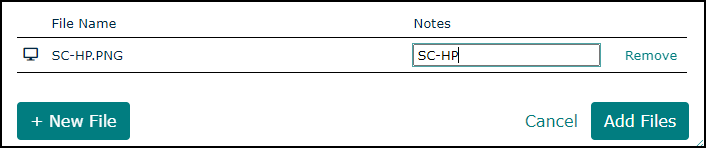
In the window that appears, choose the source of the attachment. *Note: If a new image or document is attached to the project, it will also be uploaded to the File Library.
-
Select Choose File to upload a file from your computer.
-
Select Dropbox to link to a file in a Dropbox account.
-
Select URL to enter a link to a document or file on a web page.
-
-
If you have selected the wrong file, click the Remove link and repeat this process to select the correct file.
-
Enter a note or description of the file in the optional Notes field, then click the Add Files button.
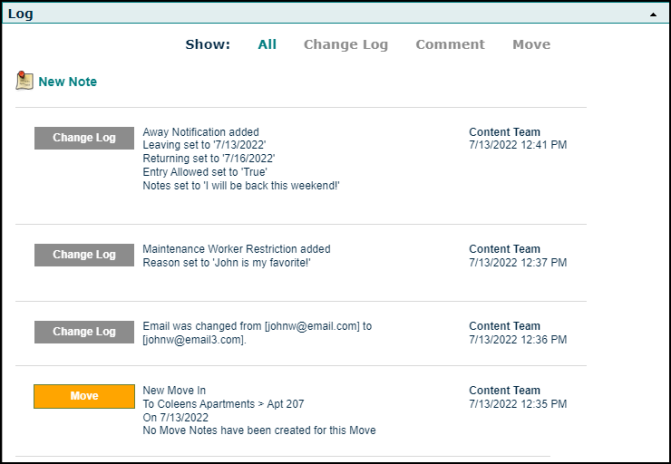
Log
The Log is where any changes made to the resident information will be recorded.
- Click Log to expand this panel.
- You can record a note in the Log by clicking the New Note button.
- Enter the note in the text box and click Save.